comparison
3D Printing vs Injection Moulding: Which Is Right?

Last Updated: October 13, 2026
How 3D Printing and Injection Moulding Work
Understanding 3D printing vs injection moulding starts with how each process works. Both create physical parts, but in fundamentally different ways.
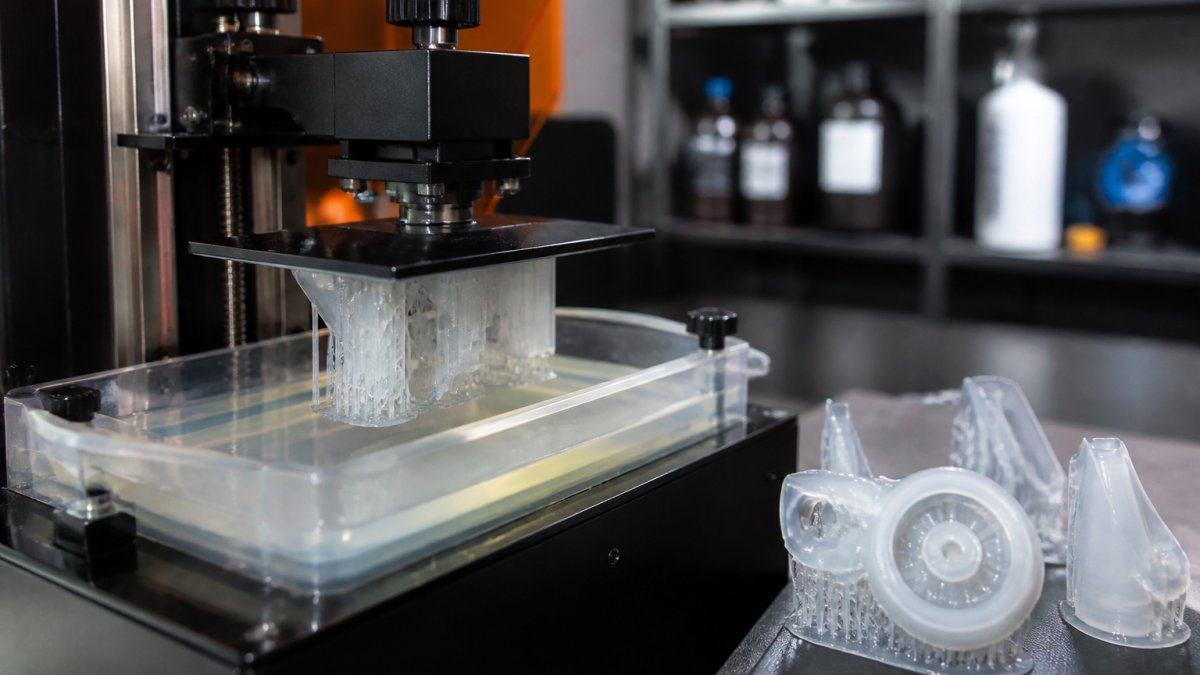
The 3D Printing Process
3D printing, or additive manufacturing, builds parts layer by layer. A digital design file guides the printer as it deposits thermoplastics, resins, or metals.
Common methods include FDM, which extrudes melted plastic through a nozzle, and resin printing, which cures liquid resin with light. Metal printing exists but is more specialised and costly.
The downside is speed per part and material consistency. A single resin print can take 8-12 hours, and orientation, layer lines, and cooling affect quality, fine for one-offs, expensive at volume.
The Injection Moulding Process
Injection moulding is the opposite approach. A steel or aluminium mould, a cavity shaped like your final part, is filled with molten plastic under pressure.
Upfront cost is steep: a mould can run from hundreds to thousands of pounds depending on complexity.
The trade-off is design rigidity. Undercuts, thin walls, and complex internal geometry become expensive or impossible to mould, parting lines are visible, and draft angles must be built in. Change the design and you need a new mould.
3D Printing vs Injection Moulding Cost: Upfront and Per-Part Economics
Cost is often the deciding factor, but the real question is total project cost, split into four buckets that behave differently between the two processes.
1. Tooling and setup. Injection moulding carries a one-off tooling charge that 3D printing does not.
**2.
3. Labour and post-processing. Printed parts often need support removal, sanding, curing, or vapour smoothing, labour applied per part.
4. Scrap and rework. A failed 3D print wastes the whole build.
How the break-even point actually moves
There is no universal crossover volume. Break-even is where tooling cost divided by part count equals the per-part saving from moulding, so it moves with four variables:
Tooling cost. A £1,000 tool breaks even far sooner than a £10,000 tool.
Per-part saving. If moulding saves £5 per part versus printing, you need fewer parts to recover the tool than if it saves £1 per part.
Part size and material. Large parts and engineering-grade materials widen the per-part gap and lower the break-even volume.
Order quantity and repeat orders. A single large order amortises tooling differently from many small orders spread over time.
Worked scenarios
These are illustrative, not quotes, but show the logic.
Scenario A, small simple part, low volume. Tooling £800. Printed part £8, moulded part £1.50. Saving £6.50 per part.
Scenario B, larger part, engineering material. Tooling £4,000. Printed part £40, moulded part £6. Saving £34 per part. Break-even = 4,000 ÷ 34 ≈ 118 parts.
Scenario C, complex part needing a multi-cavity tool. Tooling £12,000. Printed part £25, moulded part £2. Saving £23 per part.
The crossover is driven by the ratio of tooling cost to per-part saving, not a fixed number.
A quick way to estimate your own break-even
Get a firm tooling quote.
Get a per-part moulded price at your expected volume.
Get a per-part printed price at the same volume, including post-processing.
Subtract the moulded price from the printed price for the per-part saving.
Divide tooling cost by the per-part saving, that is your break-even quantity.
Add a margin for scrap, rework, and demand uncertainty.
If expected lifetime volume is comfortably above break-even, tooling is justified. If close to or below it, printing keeps capital free and design flexible.
Key Takeaway Break-even is a ratio, not a fixed number. Divide tooling cost by the per-part saving to find your crossover, then add a margin for scrap and demand risk.
At Kreative3D, we help clients work through this trade-off with instant online quoting.
Production Volume: When Each Method Makes Financial Sense
Volume directly determines which process is economical.
Low volume (1-100 parts): 3D printing is almost always right. Tooling makes injection moulding prohibitively expensive, you get parts fast, and design iteration is as simple as printing again.
Medium volume (100-1,000 parts): The grey zone. A simple part may still favour 3D printing; a complex, high-precision part may justify a mould.
High volume (1,000+ parts): Injection moulding wins clearly. Per-part cost is so much lower that tooling becomes a rounding error, mass production economics.
3D Printing vs Injection Moulding Lead Time and Speed to Market
If speed matters, 3D printing dominates.
A 3D printer can start within hours of receiving your CAD file, and the print may finish overnight.
Injection moulding requires mould fabrication first: 2-4 weeks for a simple mould, 6-8 weeks or longer for complex ones.
That is why prototyping almost always starts with 3D printing: fast feedback, quick iteration, design validation, then, if volume justifies it, injection moulding for production.
Design Complexity and Geometric Freedom: What Each Process Allows
3D printing excels at geometric freedom.
Injection moulding has real constraints. Undercuts need collapsible cores or side actions, adding cost and complexity.
The nuance: within its constraints, injection moulding achieves surface finishes and material properties 3D printing struggles with.
For custom one-offs or small batches with complex geometry, 3D printing is unbeatable. For production parts where surface finish and material properties are critical, injection moulding often wins despite its constraints.
Quality, Surface Finish, and Material Properties
Both processes produce functional parts, but the quality profile differs in ways that matter for production, not just prototypes, repeatability, tolerances, inspection, and validation for demanding or regulated uses.
Surface finish
Injection moulded parts take their finish from the tool: a polished steel cavity gives a glossy part, a textured or spark-eroded cavity a matte or patterned one. The finish is consistent from the first part to the ten-thousandth and essentially free once the tool is made.
3D printed parts show their build process. FDM parts carry visible layer lines and often need sanding, filling, or vapour smoothing; resin parts are smoother but still show support marks and may need curing and finishing.
Dimensional accuracy and tolerances
This is where the two diverge most sharply for engineering work.
Injection moulding, once stable, holds tight tolerances repeatably, a well-run tool can hold a few hundredths of a millimetre on critical dimensions, consistently across the whole batch.
3D printing tolerances depend on the process.
Practically: tight tolerances on multiple features make moulding the safer route at volume; moderate tolerances or a prototype make printing sufficient.
Repeatability and consistency
Moulding is repeatable by design: the same tool, material, and machine settings produce near-identical parts cycle after cycle, which is what makes it suitable for assembly lines where every part must fit the next.
3D printing is repeatable within a machine and material, but variation creeps in across machines, material batches, and print orientations, two printers running the same file can produce slightly different parts. Irrelevant for one-offs; must be managed for production runs where parts must interchange.
Material properties
Injection moulding uses established thermoplastic grades with well-characterised properties, tensile strength, impact resistance, temperature limits, and chemical resistance are documented and consistent. Engineering grades such as glass-filled nylons and polycarbonates are widely available and proven.
3D printing materials have improved dramatically: modern engineering resins and filaments offer good strength, temperature and chemical resistance, and some are certified for specific end uses. But printed parts are anisotropic, typically weaker along the build direction (Z-axis) than within a layer.
Inspection and validation for demanding uses
For safety-critical, regulated, or demanding applications, quality is about proving the parts are good, not just the process.
A practical validation approach includes:
Define critical dimensions and the tolerances that actually matter, rather than tolerancing everything.
Choose an inspection method proportionate to risk: callipers and gauges for simple features, CMM or optical scanning for complex geometry.
Qualify the process, not just the part: for moulding, establish and monitor a stable process window; for printing, control machine, material, and orientation, and re-validate when any change.
Run a first-article inspection on the first production parts against the drawing.
Plan ongoing checks at a frequency matched to the consequence of a bad part.
For regulated or safety-critical applications, expect to document material certificates, process parameters, and inspection results. Moulding has the longer track record, but printed parts are increasingly accepted where validation is rigorous and the material is qualified.
Watch Out Don't assume 3D printed parts are weak. Modern resins and FDM materials are strong enough for many real-world applications. But printed parts are anisotropic, so strength depends on build orientation, and if your part must survive thermal cycling, chemical exposure, or sustained mechanical stress, injection moulding's material consistency and documented properties are an advantage.
For aesthetic parts or components exposed to harsh environments, injection moulding typically delivers superior, more consistent results. For functional prototypes and custom parts where finish is secondary, 3D printing is sufficient and faster, provided you validate the tolerances and orientation that matter.
Which Method Should You Choose?
The decision comes down to four factors: volume, timeline, budget, and design complexity.
Choose 3D printing if:
You need fewer than 500 parts
Your timeline is tight (days or weeks, not months)
Your design is complex or likely to change
You want to avoid tooling costs
You're prototyping or validating a concept
Choose injection moulding if:
You need 1,000+ parts
You can wait 4-8 weeks for mould fabrication
Surface finish and material consistency are critical
You want the lowest per-unit cost at volume
Your design is locked and unlikely to change
Consider a hybrid approach if:
You're launching a new product and want to test the market first with printed parts
You expect demand to grow over time
You want to minimise risk before committing to tooling
At Kreative3D, we work across both worlds. We handle rapid 3D printing for prototypes, custom parts, and small batches. Our expertise in FDM, resin, and metal printing means we can deliver the right solution.
Frequently Asked Questions
When should you choose 3D printing over injection moulding?
Choose 3D printing for low-volume production runs, rapid prototyping, and designs with intricate geometry or complex internal features. 3D printing excels when you need quick turnaround, design iteration flexibility, or one-off custom parts. It's ideal for small batches (typically under 1,000 units), reverse engineering projects, and situations where tooling costs would be prohibitive. Injection moulding becomes more economical once your production volume justifies the upfront tooling investment.
At what production volume does injection moulding become cheaper than 3D printing?
The break-even point depends on part complexity, size, and material choice, but injection moulding typically becomes cost-effective between 500 and 5,000 units. For simple, small parts, break-even may occur lower; for large or complex parts, it may be higher. Once you exceed the break-even volume, per-part costs with injection moulding drop significantly, making it the economical choice for mass production. Request a quote to determine the exact threshold for your specific part.
Which is faster for producing plastic parts: 3D printing or injection moulding?
3D printing is faster for initial delivery and small batches. A single 3D-printed part can be ready within days, while injection moulding requires weeks or months to design and manufacture the mould before production begins. However, once the mould is made, injection moulding produces parts much faster in bulk, with cycle times measured in seconds to minutes per part. For urgent prototypes or one-off parts, 3D printing wins. For large-volume orders, injection moulding is faster overall.
What are the main design differences between 3D printing and injection moulding?
3D printing allows complex geometries, overhangs, hollow structures, and intricate internal features without additional tooling. Injection moulding requires draft angles (slight tapers), parting lines (where the mould halves meet), and avoidance of thin walls or tight undercuts. 3D printing offers greater design freedom, while injection moulding demands simpler, more manufacturable geometry. If your design features intricate details, internal channels, or complex shapes, 3D printing is more accommodating. For simple, functional parts, injection moulding's constraints are rarely an issue.
Can 3D printing be used to make prototypes before injection moulding?
Yes, absolutely. 3D printing is an ideal prototyping tool before committing to injection moulding tooling. You can quickly produce functional prototypes, test design iterations, identify manufacturing issues, and validate part fit and performance, all before the significant expense of mould creation. This approach reduces risk, shortens development cycles, and often results in better final designs. Many manufacturers use 3D printing for rapid prototyping, then transition to injection moulding once the design is proven and production volumes justify the tooling cost.
Choosing between 3D printing and injection moulding isn't about picking the "better" technology, it's about matching the process to your project's constraints. Early-stage designs, tight timelines, and small volumes favour 3D printing. Proven designs, high volumes, and demanding material properties favour injection moulding. Get an instant quote from Kreative3D and see how our expertise in rapid prototyping and precision manufacturing can accelerate your project from concept to finished part.